Build Part 3
Fueling
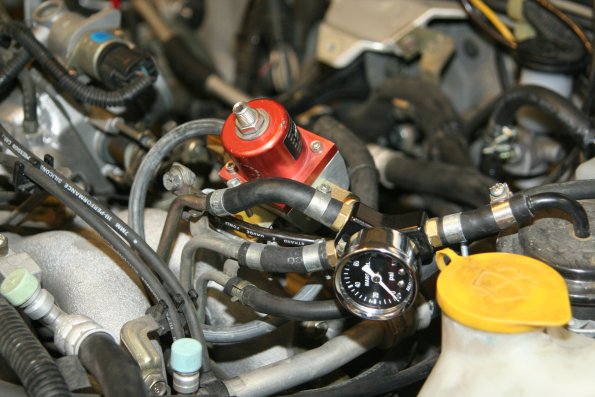
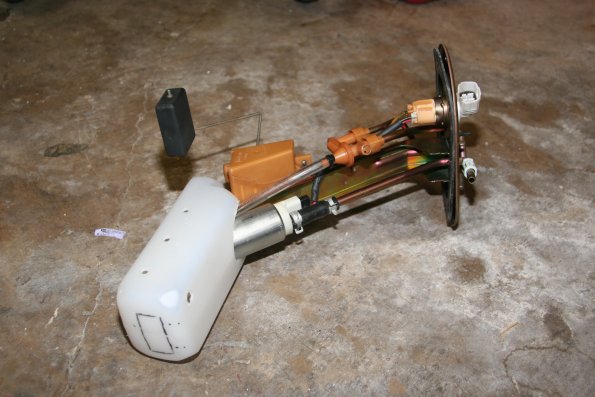
Although not necessary at this stage of the build, I have upgraded the fuel system in my car. I've installed a used STi fuel pump, an SX Performance adjustable fuel pressure regulator, and the [[Shanes_parallel_fuel_rail_mod|Parallel Fuel Rail Mod]]. The supercharger is going to need more fuel. If it is through a RRFPR or WRX Injectors with EM, the stock RS pump does not have the capacity to comfortably produce the volume or pressure I'll need. It could, but would be at the upper limit of it's ability. Hence the need for the STi fuel pump. The increase in pump volume over the stock one is not a huge amount. But, it's enough to cover the increase in fuel I'll need. The stock RS pump is rated at about 110lph, while the STi pump is rated at about 145lph. Besides, for the price, it was an easy investment choice. Used STi and WRX pumps can be had on NASIOC for cheap. The stock RS FPR was very likely capable of handling the added fuel. But, the used SX Performance FPR came at such a good price, I saw no reason not to go with it. Plus, if I go the route of an RRPFR, I'll need a decent FPR that can handle the added pressure.
The Parallel Fuel Rail Mod Writeup
Another mod I did while I was into the fuel system was the Anti Slosh Surge Tank Mod
Designing the Mounting Brackets
With the heat of the South Texas Summer not easing off into Fall, I can start designing and building the mounting bracket.
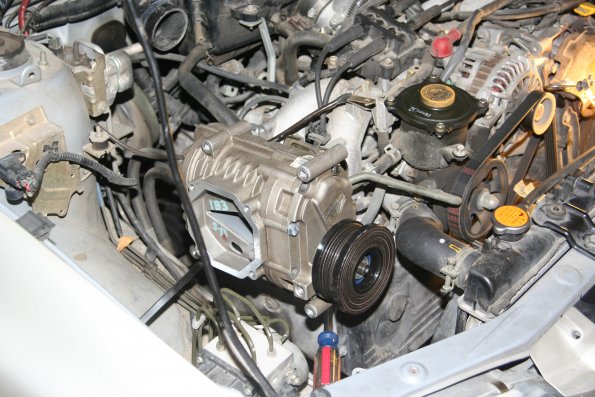
I expect building the mounting bracket to be the hardest and most important part of the whole build. I plan to mount the SC so it's laying on it's side. This will help keep it's center of gravity closer to the mounting points on the engine, thus causing less stress on the brackets. This way should also help with belt routing. I plan to run the belt under the radiator hose. This should give the SC pulley about 180o of belt wrap.
My material of choice for the support brackets is going to be 1/4" and 3/16" angle steel. Why steel rather than aluminum? Cost and Strength. Steel is much cheaper than aluminum, and for the same thickness, much stronger. Not to mention, the steel I need is readily available at Lowes. Lowes also sells aluminum, but not in the thickness I would have needed, and it's not heat treated. Oh yeah, and my welding skills are not the best in the world. In fact, I wouldn't even call myself a ''good'' welder. More like, competent. I also only have a Miller AC/DC Arc Welder at my disposal. Once again, making steel the better choice for me.
Most of the brackets I'll be making will be of 1/4" steel. I used a some 3/16" in a couple of places where serious load was not expected. But, anywhere strength was a concern I used 1/4".
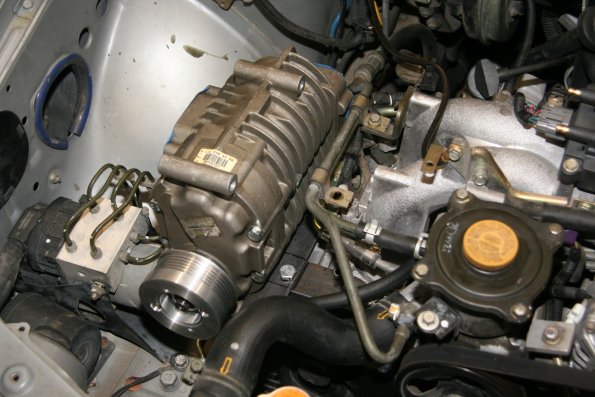
Shows roughly how the SC will sit in the engine bay
The Bottom Bracket Pieces
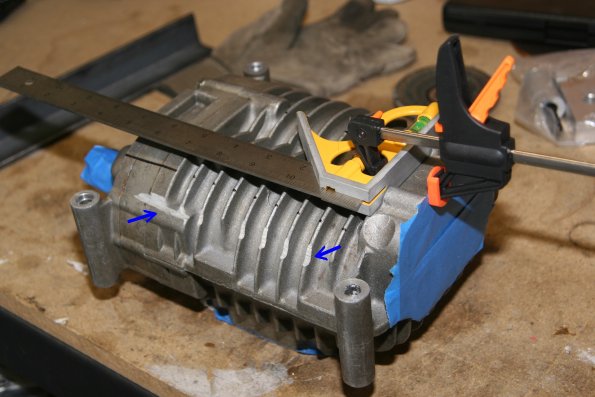
Straight and Parallel on the Supercharger
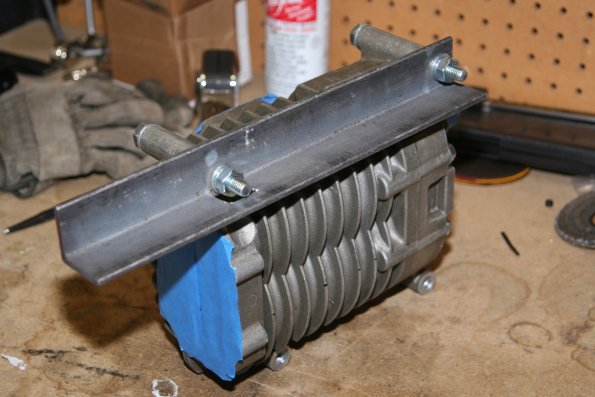
First I needed to secure a length of the 3/16" angle steel to the supercharger. This length MUST be parallel to the center axis of the supercharger. In order to obtain a true centerline, I clamped a square to the the intake end. This provided an accureate parallel line to measure off. I need this because the 2 primary mounting points are NOT parallel to the center axis of the supercharger. They are offset about 1/4". You can see on the supercharger (blue arrows) a few places where I ground down the aluminum a little to give the angle bracket a little more clearance to get closer to the supercharger.
The Cross bracket, and a few minor tweaks to the SCs fins.
Once the correct alignment was determined, the holes were drilled. However due to how close to the side of the angle steel the rear mount was, I needed to cut out a small square to allow the nut to fit in place. In hindsight, A complete hole was not necessary. Removing some material with the grinder should have been enough.
The cross bracket mounted to the SC, nice and straight
All 3 Bottom Support Pieces
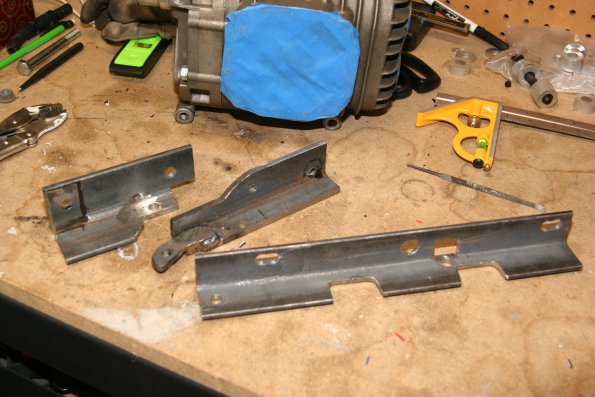
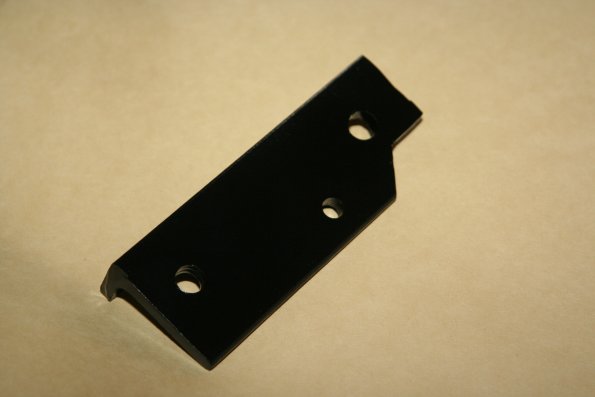
The bottom bracket which will take 90% of the weight of the supercharger, and almost all the belt load, is made up of 3 pieces. Piece #1 is the cross piece bolted to the supercharger (see above) made of 3/16" angle steel. Pieces #2 and #3 are made of 1/4" angle steel that will bolt to the head and provide a straight and level place to bolt piece #1. Note the elongated holes on piece #1. These holes will allow the SC to be moved forward<->backward to gain ideal belt alignment. Also note the odd shaped piece of 1/4" steel welded to the middle piece. This compensates for the 1/4" offset of the 2 timing cover bolt hols that will be used to secure this bracket. High-Temp paint is still to come.
Note, the layout of the bracket that mounts to the rear of the head has changed slightly. It's much more simple of a design now. See later photos.
These are the 3 bottom bracket pieces basically 99% complete.
Here is a shot of the SC actually bolted in.
(Bottom Brackets Only)
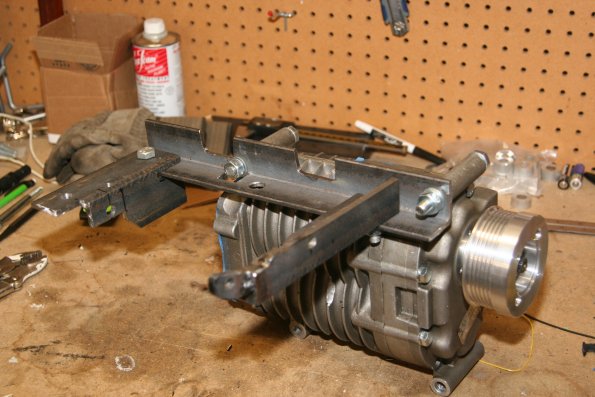
The 3 primary bottom bracket pieces still bolted to the SC.
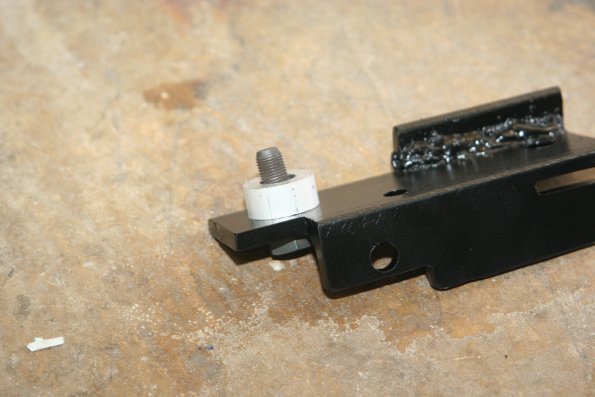
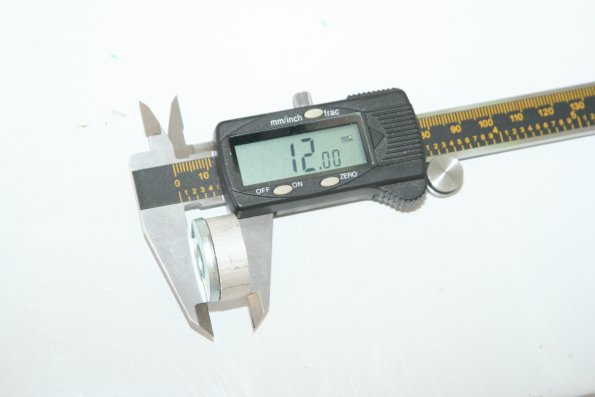
The back side bracket needs a 12mm spacer where the M10-1.25 bolt goes.
Again, note that this bracket design has changed, but the 12mm spacer is still needed.
I used an aluminum slug, and a large washer to make the 12mm spacer.
Top Bracket
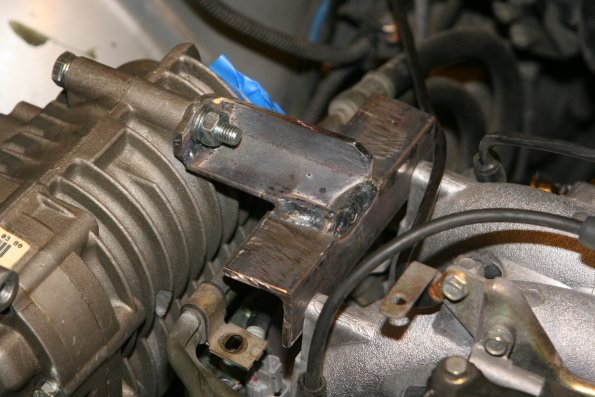
The top bracket is a heck of a lot easier to setup. It's not going to be forced to hold the weight of the supercharger, nor take a lot of the belt load. It will be used to triangulate the brackets better, and prevent any upper movement of the supercharger. It was really just a case of using a piece of 3/16" angle mounted to the 2 holes in the intake manifold. Then, a 2nd piece of 3/16" angle welded perpendicuar and lined up with the upper mounting hold in the supercharger. The mounting holes that bolt to the intake manifold are oval in shape to allow for back&forth adjustment for belt alignment.
The upper bracket welded together and mounted to the top of the Intake and Supercharger
Idler Pulley Bracket
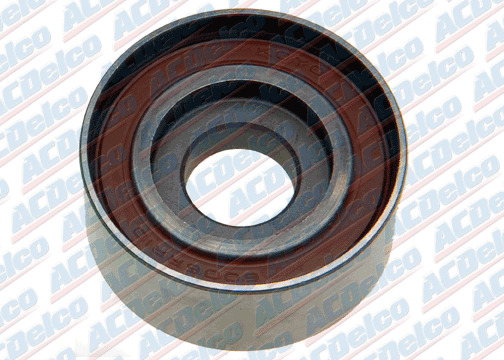
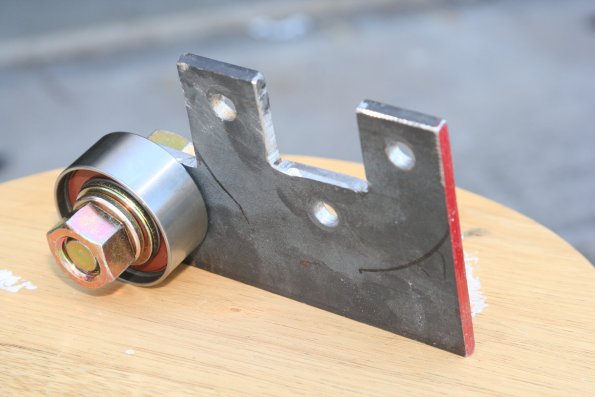
Today I managed to hammer out the idler pulley bracket. The hardest part was finding an idler pulley to suit my needs. I wanted a pulley made of steel, and I wanted it to be as close to 50mm in diameter as possible. Unfortunatly most accessory belt idler pulleys come in 70mm+ sizes. 70mm was just a little to big for the layout I have planned for the belt and pulley. I know using a 50mm pulley will put more stress on the belt, and more stress on the pulley bearing (higher speeds) but I'm willing to deal with possibly having to change the belt a little more often and even the pulley. What I found was a 55mm steel timing belt pulley used on a large number of Hondas. I picked up a Gates/ACDelco T41232 timing belt idler pulley from O'Reilly Autoparts. This pulley just happens to be ideal for my needs. The inner bearing race even sits about 1mm past the edge of the pulley, providing a very nice sturdy mounting point.
Idler Pulley. ACDelco:T41232
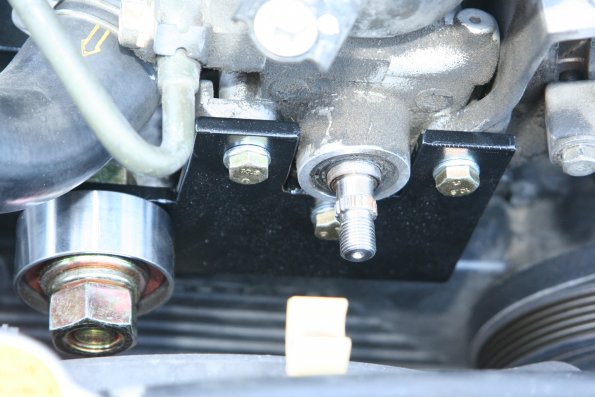
I then cut out the bracket from a piece of 1/4" plate steel. The pulley is mounted to the power steering bracket using the 3 bolts just behind the power steering pulley. The 1/4" thick bracket is a 100% perfect fit behind the pulley. There is a wafer thin gap between the back edge of the power steering pulley and the face of the idler pulley bracket. It's very close, but clears just fine.
Idler Pulley. ACDelco:T41232
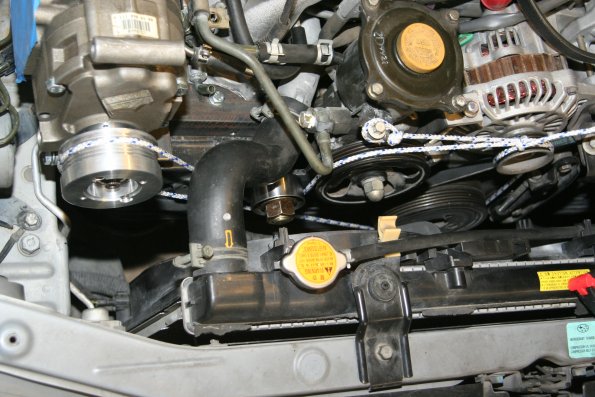
I ran a piece of rope around the pulleys to simulate the belt installed. You can see the idler pulley mounted just below the radiator hose.
Idler pulley installed + rope to simulate belt
Here is a close up of the idler pulley. You can see how it is positioned relative to the power steering pulley.
Closeup of the idler pulley bolted in place with longer Grade-8 bolts
As you can see in the following photo, the clearances are close. The belt returning to the crank pulley has about a 3/4"-1" gap to the idler pulley. The belt running up from the idler pulley to the Supercharger pulley also has about a 3/4"-1" gap between the radiator hose. It's close, but more than enough room. Hopefully belt orbiting won't be an issue with the long run between SC pulley and crank pulley.
Idler pulley installed + rope to simulate belt
All Fit Together
With the high-temp paint all dry and cured (7-days), I installed all of the primary mounting brackets.
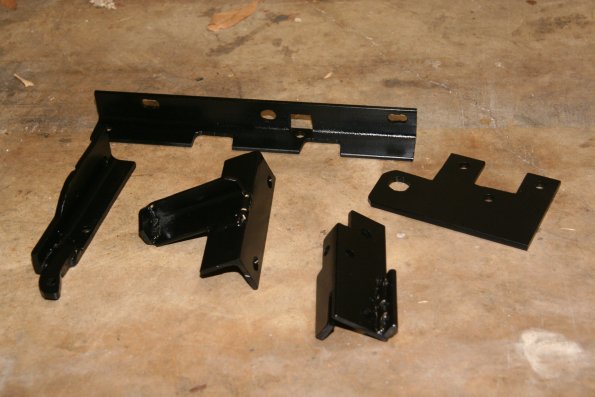
All 4 primary mounting brackets, and the idler pulley bracket all painted with engine enamel.
The back-side lower bracket required a 12mm spacer for the large M12 bolt. I had some scrap aluminum that was perfect for the spacer. I used the aluminum combined with a large steel washer to make up the total 12mm of spacer. The steel washer went between the block and the aluminum slug to help prevent the block from sinking into the softer aluminum spacer when the bolt was torqued down.
You might notice that the back side lower bracket looks slightly different in more recent photos. That's because I decided to simplify it's design.
The revised lower back bracket. Note the difference compared to above.
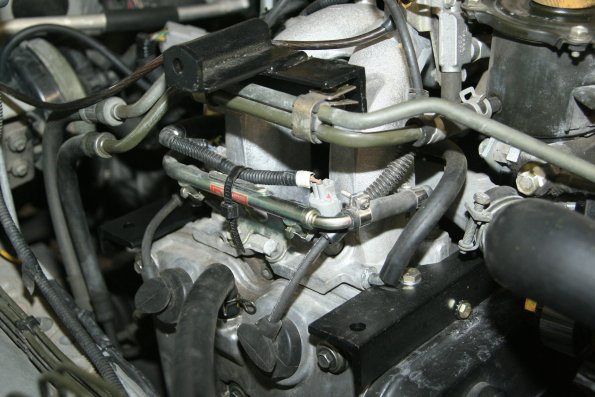
With all the brackets completed, I can leave them installed as I work out the details for the other parts.
2 different views of the 3 primary mounting brackets.
