Build Part 2
The initial big ticket purchase
Well, after going over and over and over the calculations from the previous pages, it looked like an Eaton M62 was pretty much the perfect blower for this project. At 10K it could produce 325cfm of air at 5psi. And it has a max rpm of about 14K, so there is room to move if I need/want to. I also looked at the M45 blowers. And at 14K+ rpm, they ''can'' produce the cfm I need. But, that'll be spinning that guy at it's redline. Sure, it's possible, but now I have NO room to move. So, the M62 it is. It's well sized for my current needs, and somewhat future proof. Now, to find one. And where would someone look for one of these? [eBay][http://www.ebay.com EBay] of course. Well, it just happened that someone from California was selling 3 M62 superchargers from their Honda Del Sol project.
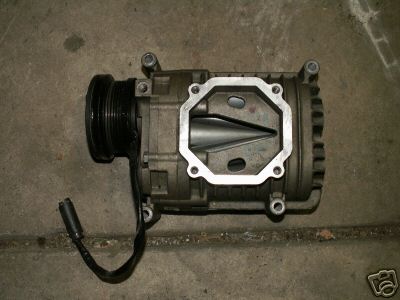
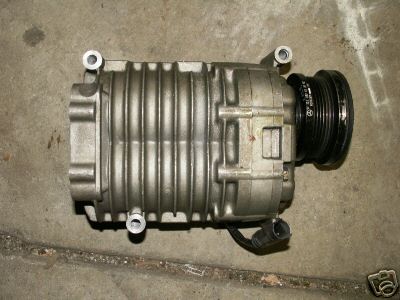
They are the perfect ones for this project. They have no integrated intake piping. They have an extra short pulley nose which is great for trying to fit into the engine bay. The electric clutch would be awesome to try and use, but it's a 3-5/8" diameter. No good at all with my 5-1/4" crank pulley. But, alas, the build is on!!
The Build Steps
Remember, this is my Daily Driver. I can't really afford to take her off the road for an extended period of time. A week at the most is really my limit. So.. I'm going to try and do this build in steps that allow modifications to be done that will not keep her off the road. I don't have every step precisely planned out yet, but I have an idea of what I'm going to do and when. I'm going to take my sweet time doing this build anyway. For the reason of cost, and care. I don't have the $$$ to drop it all in at once, and the longer I take to complete a phase, the more care I'm likely to put into it.
Bits for Tuning and Monitoring
I'm going to need to keep a close eye on my Short Term and Long Term Fuel Trims (STFT, LTFT), my knock correction, my AF ratios, and EGTs. The Stock ECU already watches the first bits, but the EGTs I'll need a pyrometer gauge for. Turns out, I just happen to already have one! As for the STFT and what not, in steps a few easy to use options for that. There is ECUExplorer. But, it requires the use of a laptop in my car. Not exactly convenient. So, I've written my own piece of Software that works on most Java enabled mobile devices, including my Palm Pilot. It's called ECU Tracker. This is perfect! Using a bluetooth enabled OBD2 module that also does the Subaru Specific SSM protocol, I can watch my fuel trims all the time with ease. The ECU Tracker Software also works with the common ELM modules too. The only downside is the refresh rate of the ELM module. It's not even close to as good as the SSM protocol used by Subaru.
Since writing this section in 2009, I've now added a full blown In-Car-PC InCarPC to monitoring and tuning.
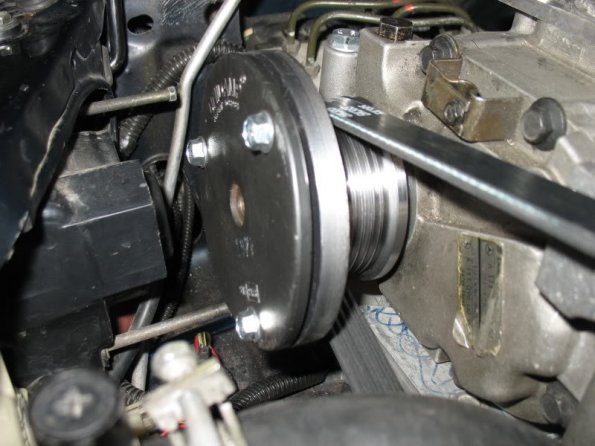
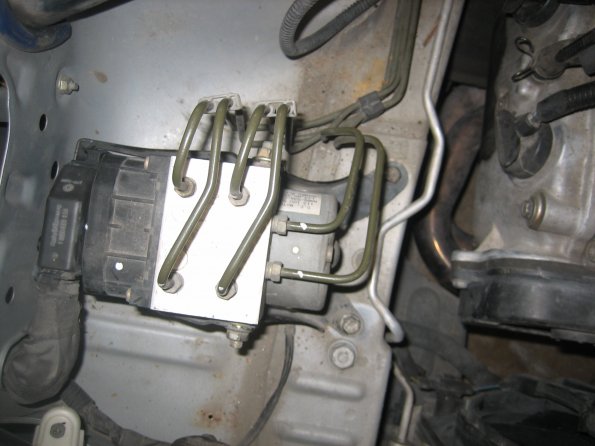
Moving the ABS pump
Well, in the end I didn't actually move the pump. I would have liked to. It would have given me much more room to do so. But, I found that simply bending the 2 pump input lines out of the way, gave me just enough room. Therefore, the pump is still mounted in the same place, but I think I have the space I need now. We'll see though. As this project progresses, I may yet still move this thing.
Here is the before shot:
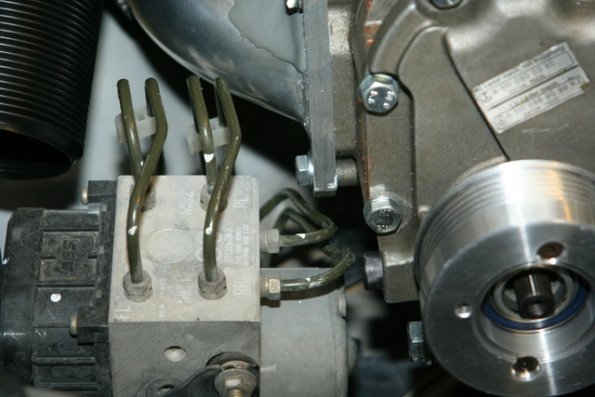
After, WITH the SC in place.
Don't be fooled by how close that lower right line looks, there is far more clearance that it appears.
The Pulley
Note: If you wish to create one of these pulleys, I'll happily point you in the direction of Randal. He has made a couple of pulleys now for others duplicating my supercharger design. I know he'll be happy to make you one too. Your best to contact me Skidd on RS25.com
My original pulley re-design called for a 3.25" pulley. This it turns out is the wrong size. A 3.25" pulley from my stock 5.25" crank pulley, pumping air through my Forester XT intercooler resulted in only 2-2.5psi of boost. I expect the Intercooler is dropping less than 1ps though. Back to the drawing board.
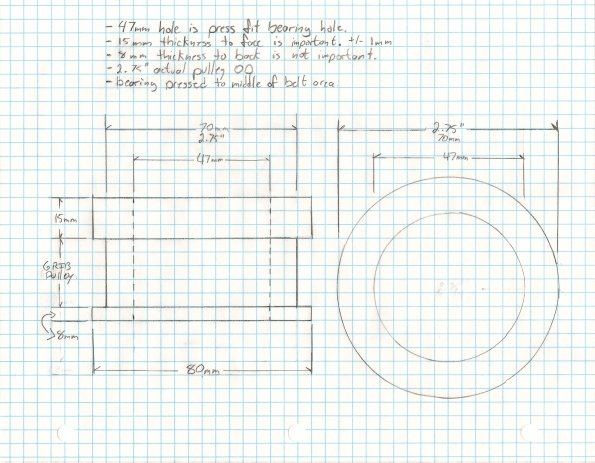
Note: This section is a little out of sequence since this 2.75" pulley was made after I completed this install. The following pages outline the brackets and more of the install. So, technically this section should be at the end. But, that makes even less sense. So, what came first? The Chicken or the Egg? In this case, it was the Pulley.
I contacted the guy I had make my original pulley once again. Asking if he was up to a 2nd pulley. He responded quickly enough with a "sure". But, that's the last I've heard from him. I have no idea why, but he either is too busy, or doesn't care. Either way, Smoothflowpulleys.com is out. All he had to do was say "thanks, but no thanks" and I would have just looked elsewhere. Instead, he chose the path of least resistance, and seems to have decided to ignore me.
Back to Google then and in search of someone who can fab me a new pulley. The good news, my pulley-redesign is a much much simpler one. I expect anybody with good lath skills can make this one. No more modular design for quick change. No more snap rings and ridges. Just a pulley, a press-fit bearing, and the spline plate coupler.
Pulley Design Sketch (not to exact scale)
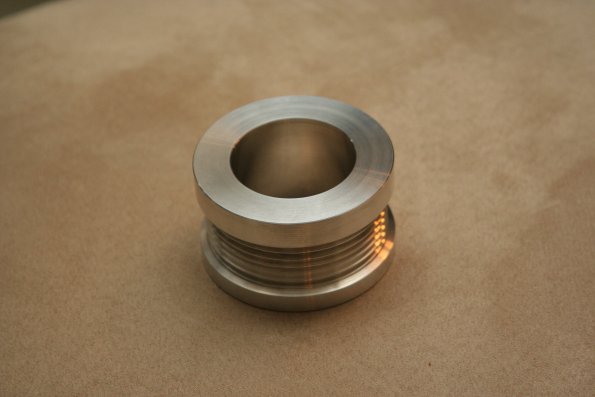
With the help of Google, I stumble upon a web site called UtterPower.com. They appear to be in the business of custom parts for diesel generators. But, within the site I do see references to custom made pulleys for these generators also. I figure, what the heck and send off a feeler email. Less than 24 hours later, I have a response from Randall saying he can easily make my pulley! So, I send him an email with much more details, a link to my diagram, and a link to the pages of images of the stuff I already have. A couple of days later, we strike up a fair deal on price, parts and labor, and I send him the OEM pulley and bearing for reference. After he receives the parts, we talk for a while on the phone hammering out the exact details and how it all fits together. By the way, it turns out he is a former Boeing Engineer who does this sort of stuff on the side. He's built pulleys and parts for everything from HotRods to Boats. A couple of photos of his custom crank pulleys can be seen here About 1 week later, my new 2.75" pulley is on it's way back to me. Using a gear-puller and a home made mandrel, I pressed the bearing into the pulley. It took a good amount of torque on the puller, but went in easy enough. No need for a hydraulic press here.
The new 2.75" Press Fit pulley
A home-made gear-puller based Bearing Press
I also used some Loctite PressBearing compund.
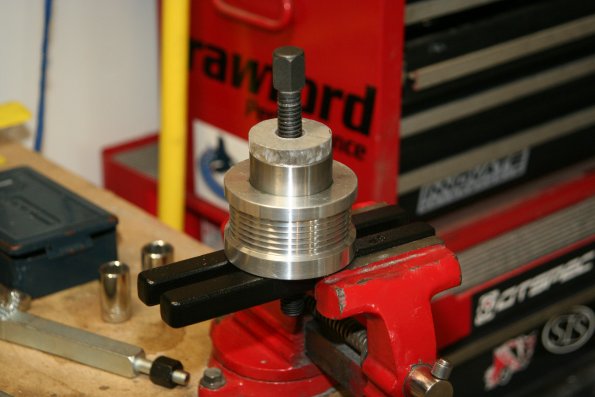
Once the bearing was in place, I slid the pulley onto the supercharger snout and the spline-coupler plate. The pulley from Randal didn't come with the 8 drill and tapped cap-screw holes. It was much easier for me to do this than try to get measurements to Randal. It was dead easy anyway. I just marked the hole locations with a marker, pulled the pulley back off, and drilled the 8 holes with a drill press. Then, VERY carefully tapped each one. You have to go slow and easy with aluminum because it galls up so quick. Once the holes were drilled, back on the pulley went, and all 8 coupler bolts. I also put a M8 bolt in the center as one more added bit of security. I didn't torque it down tight though, because I didn't want it pulling on the drive shaft. I just put on some Loctite and gave it a couple of inch-pounds. There is still the main snap-ring on the drive snout that is used to keep the bearing on the supercharger.
The bearing mounted and secured.
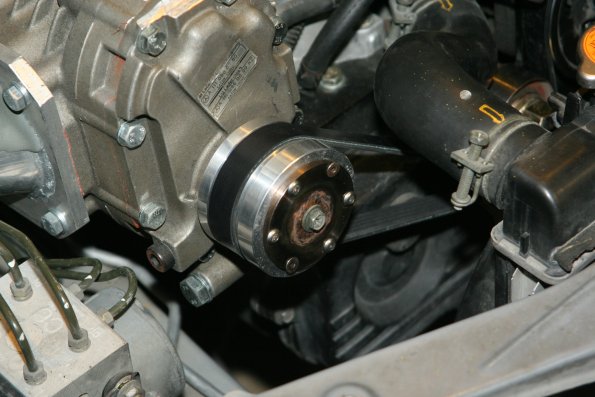
Now for a hiccup I didn't fully expect, the correct length of Belt. It turns out that nobody makes a 5-rib belt in the length I need. In fact, not a single 5-rib was even close! But, thanks to a few fellow gear heads, and obvious solution was given to me. Find a 6 or more rib belt in the correct length, and just cut off the extra rib!! haha.. that seems way to easy. Sure enough, NAPA had a 6-rib that was the PERFECT length. A few minutes later with a box-cutter, and I have a 5-rib belt in the exact correct length. And, just as a precaution, I keep my original belt and a 12mm socket in my car. Should the SC belt go snap for some reason, it can easily put the original belt back on to get to my destination.
Update on the Belt, I was wrong! Dayco does infact make the EXACT correct length of 5-rib belt I need. Trotted into PepBoys, asked for a Dayco XXXX (need to confirm the part number), and it fit perfectly!!
The result of a 2.75" pulley coupled to my OEM crank pulley... 5psi of max boost! Perfect! Pretty much just what I was targeting. A safe and fun increase in power.
Here are all the pulley photos
Avoiding a Rattle
After quite a little while of use, my Supercharger started to produce a strange rattle at idle and low RPMs. It sounded EXACTLY like a rattle from a bad snout coupler (something this SC doesn't even use) or a bad bearing. It sounded like it was coming from the rear needle bearings. So, I ordered a pair of new ones, and installed them. However, the rattle persisted! Anothernord also started to notice this same rattle in his SC. Hmmm...
After a bit more fiddling and playing with my setup, I discovered what the actual rattle was from. It was caused by the small amount of slop found in the drive splines. The spline plate, slipped onto the input shaft is a nice snug fit, but not rock-solid tight. It turns out that Mercedes actually uses small shims inside the spline to adjust the gap at the clutch face. So, I did the same thing, adjusting the gap to pretty much zero. Then, put a bolt in the center of the spline plate (see above photo), into the input shaft, and snugged it down nice and snug. Result? No more rattle.
So, if anybody goes with a custom pulley on the SC, be sure to use a center bold, and make it snug! Just watch out for any side loading of the pulley bearing. If you stay with the OEM Mercedes pulley, you should be fine.
An Alternative Pulley Option
Thanks to anothernord on RS25.com there is another option for making a custom pulley to fit this unique Supercharger.